Publication in Additive Manufacturing

 Automated metrology and geometric analysis of additively manufactured lattice structures
has been accepted to Additive Manufacturing.
Abstract
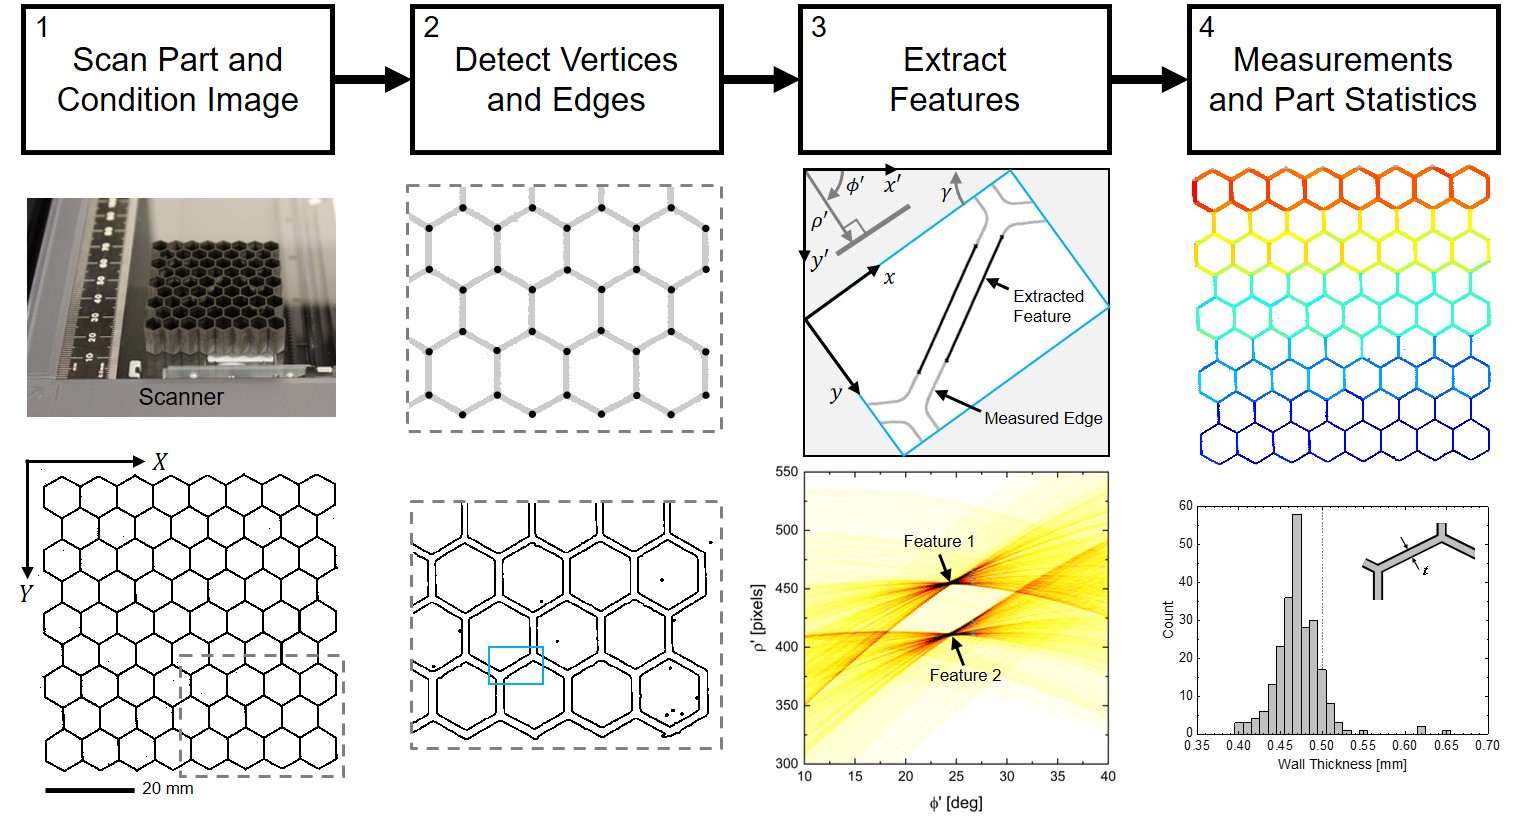
Additive manufacturing (AM) enables the fabrication of complex lattice structures, for which a single part may have hundreds or thousands of individual geometric features. Conventional methods for measuring part geometry and performing quality control, which typically use a small number of low-dimensional measurements, are not well suited for lattice structures. This paper describes a method for scanning and automatically extracting individual features of the lattice and applies this method to characterize AM lattice structures in both twodimensional and three-dimensional lattices. The research measured 94 lattice parts fabricated from 3 materials in 9 different designs using either a high-resolution document scanner or X-ray computed tomography (CT). A statistical analysis considered manufacturing variances as a function of material type and part design on a subset of the data, comprising the size and location of over 15,000 individual features. We studied the geometric variations of these struts in uniform, hierarchical and gradated parts. For a single design and material, the standard deviation of lattice feature size is quite small. For example, a lattice strut with thickness 0.5mm has a standard deviation of 30 μm. However, when the same process is used to manufacture multiple parts having different designs and from different materials, the standard deviation of feature size can be larger by 2X or more. This type of automated measurement and analysis may allow for rigorous monitoring, qualification and control of AM lattice parts in production.


